Usually this dynamic information from the environment is displayed in your shell’s prompt. Common options are displaying the current working directory, time or git status. While this is working fine, it is also taking up a lot of screen real-estate in every line. Also, some of the information displayed in the prompt, is most useful at the exact moment you are interacting with the terminal, and the historic state is not really important. This makes it a perfect candidate for moving it to the status bar.
By default iTerm2 has builtin status bar support for displaying the current battery level, CPU and memory utilization, network throughput and more. While this is a great starting point, there is a lot more potential when making it your own and customizing it to your needs.
Getting Started
If you have not used the new Status Bar before, you can activate it by going to Preferences >Profiles > Session > and tick the checkbox next to Status Bar Enabled. The Configure Status Bar button is where you can setup the basic functionality of the status bar.
Next to the various standard components, there are also special ones, like Interpolated String and Call Script Function. In the following, we will make use of interpolated strings to create components with custom information.
When you start customzing the status bar for the first time, a shell integration has to be installed. The easiest way to do this is via iTerm2 > Install shell integration. Now we are all set-up to get started.
Creating a custom component can be separated into two logical parts: Collecting the information you want display and configuring the status bar to show it. The following paragraphs will go over these two steps in detail.
Collecting the information
The most simple way to collect information from your shell is by writing a few lines of bash script. The following is a simple example of how to collect information about the current selected AWS profile and make it available to the terminal.
Depending on your shell, the snippet looks a little bit different. Therefor you will have to choose the appropiate snippet below.
# ----- zsh / bash snippet, place in ~/.zshrc / ~/.bashrc -----
source $HOME/.iterm2_shell_integration.zsh
iterm2_print_user_vars() {
iterm2_set_user_var awsProfile $AWS_PROFILE
}
# ----- fish snippet, place in ~/.config/fish/config.fish -----
source ~/.iterm2_shell_integration.fish
function iterm2_print_user_vars
iterm2_set_user_var awsProfile $AWS_PROFILE
end
Lets go over the zsh / bash snippet line by line:
First we will configure the iTerm2 shell integration
source $HOME/.iterm2_shell_integration.zsh
Then define the function which collects all our iTerm2 related information
iterm2_print_user_vars() {
# your custom code
}
And finally, add our custom code to set the iTerm2 user variable awsProfile to our desired information. In this case the information is already available in the environment variable $AWS_PROFILE, so we can simple assign this variable.
iterm2_set_user_var awsProfile $AWS_PROFILE
Also take a look at the following more complex code snippet to retrieve the current Kubernetes Context:
KUBECONTEXT=$(CTX=$(kubectl config current-context) 2> /dev/null;if [ $? -eq 0 ]; then echo $CTX;fi)
iterm2_set_user_var kubeContext $KUBECONTEXT
The current Kubernetes Context can be retrieved by running kubectl config current-context. As this command will exit with an error code when no context is set, we add some wrapper code to only echo the context when the information is available. We can now add this custom code to the body of our iterm2_print_user_vars() function as well.
The last step is to display the collected information in the status bar.
Configuring the Status Bar to Show your Custom Information
Now that we have collected all our information, we can display it by adding custom Interpolated String components to it. This can be done by going to Preferences >Profiles > Session > Configure Status Bar and dragging a Interpolated String component to the list of active components.
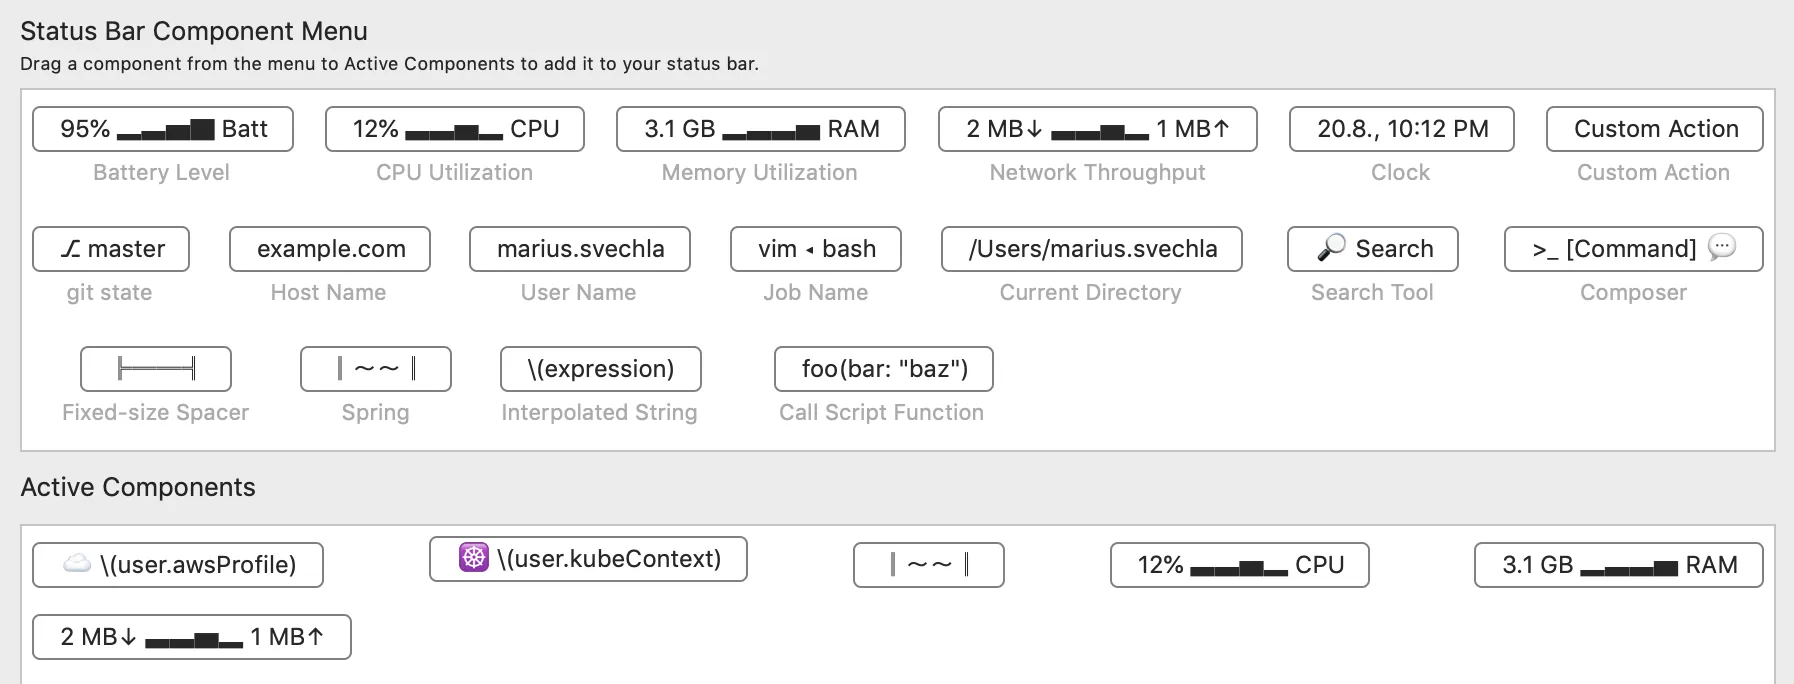
Status Bar Component Menu
After the component is placed, we can select it and click on Configure Component.
This opens up a window where we can configure a string expression and some additional formatting. Expressions are wrapped in \(myExpression) . Our previously populated iTerm user variables can be accessed inside the expression by prefixing the variable names with user. ,e.g. user.awsProfile. Additionally, we can add static text or emotes outside of the expression.
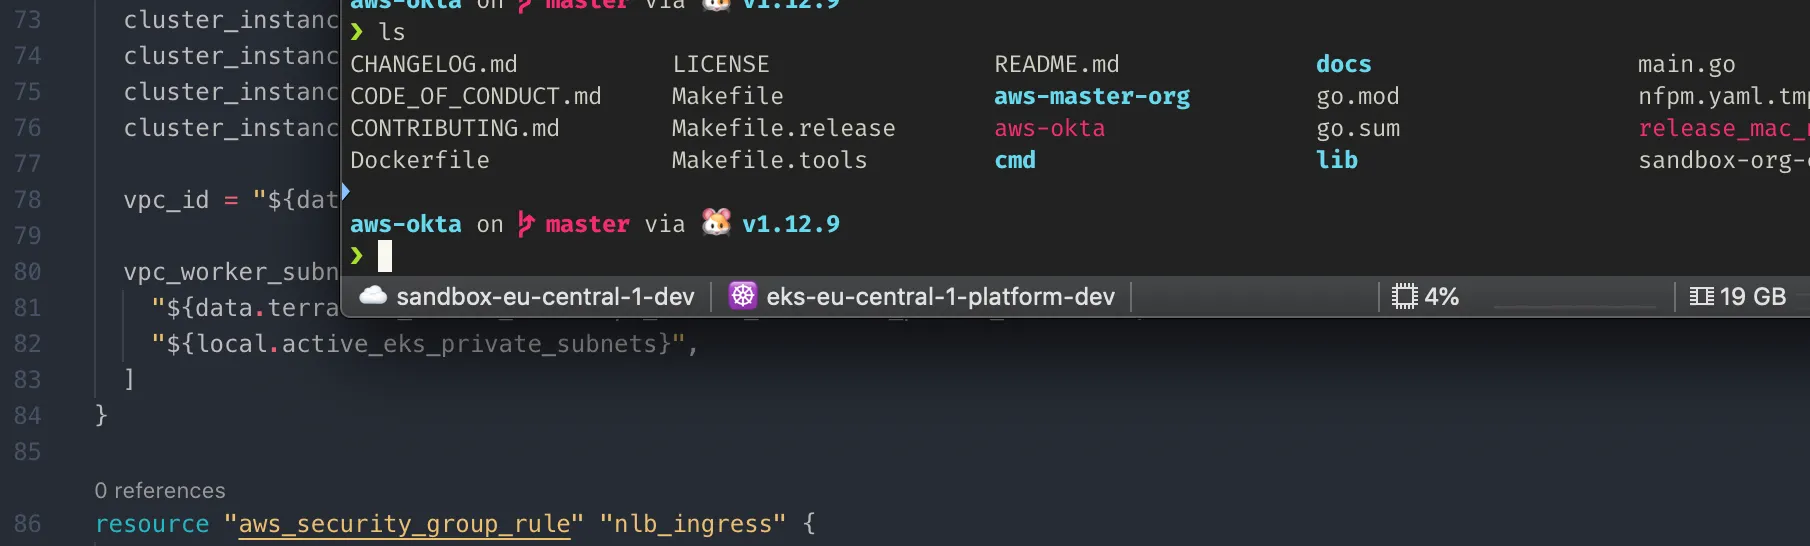
So we can for example use the interpolated string ☁️☁️\(user.awsProfile) to show the current AWS profile, or ☸️ \(user.kubeContext) to show the current Kubernetes Context.

Customized Status Bar
Hopefully this gave you a first hands-on look on how to start customizing the new status bar. So lets get started and make it your own!
If you want to learn more about customizing iTerm2, check out the following links: